
MariaDB+GaleraClusterの場合、各ノードで書き込み・読込みがされるのだけど、そうなると同じ行に同時タイミングで複数ノードから書き込みをしようとしてデッドロックになる事がある。
これを防ぐため、MariaDBでは専用のロードバランサー用に『Maxscale』というものが用意されている。
実際、会社でも使っているソフトなので、今回はこれをインストールし、GaleraClusterに接続してみよう。
1.Maxscaleの概要
Maxscaleの概要についてだが、細かく説明するとすごく大変そうなので、とりあえず以下のようなイメージだけ覚えておくと良いだろう。
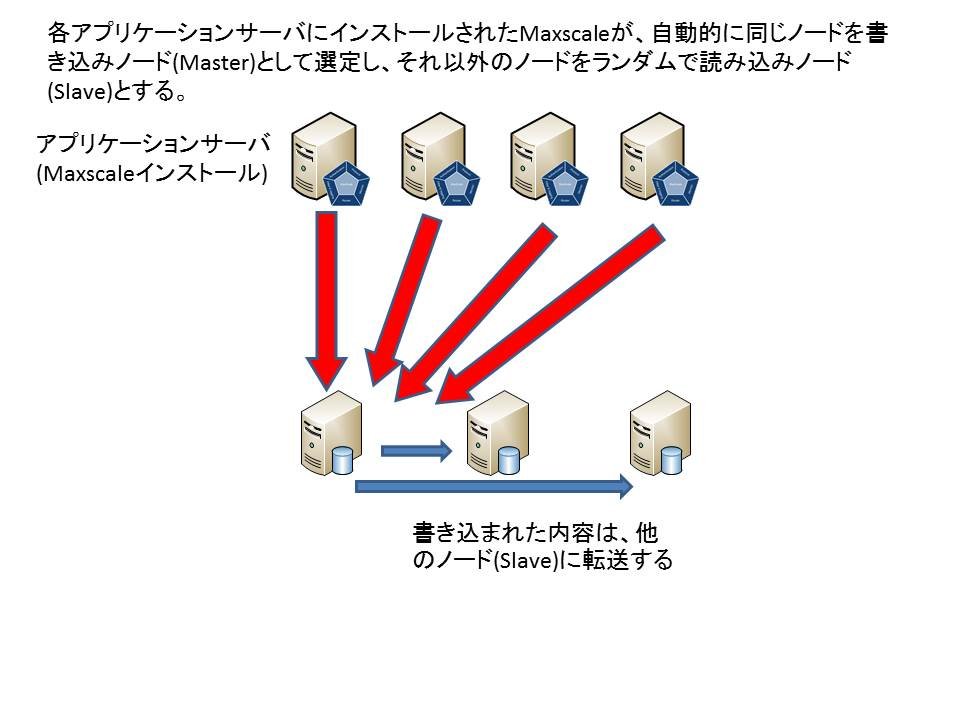
要は、DBへ接続する各サーバにインストールするタイプのロードバランサーで、いろんな使い方はあるのだけど、基本的にはGaleraClusterの状態を読み取って1台のノードを書き込みノードとして選定して接続するよ、というもの。クライアント間での連携は不要だけど、各GaleraCluster構成ノードについての情報(接続先や状態の監視用ID/PWなど)を設定ファイルに記述する必要がある。
今回は、CentOS7をこのクライアントとみなし、Maxscaleをインストールしてみることにしよう。
2.インストール
まずはインストール。以下のコマンドをMaxscaleをインストールするサーバで実行する。
rpm -i http://downloads.mariadb.com/enterprise/3qdq-gj0j/generate/10.0/mariadb-enterprise-repository.rpm
yum install -y maxscale
インストール完了後、以下のコマンドで無事終了していることを確認する。
rpm -qi maxscale[root@BS-PUB-GFRONT-01 ~]# rpm -qi maxscale
Name : maxscale
Version : 1.2.1
Release : 1
Architecture: x86_64
Install Date: 2016年01月31日 21時37分26秒
Group : unknown
Size : 80467684
License : GPLv2
Signature : RSA/SHA1, 2015年10月01日 23時12分39秒, Key ID 70e4618a8167ee24
Source RPM : maxscale-1.2.1-1.src.rpm
Build Date : 2015年10月01日 23時04分37秒
Build Host : ip-10-84-7-34.eu-west-1.compute.internal
Relocations : (not relocatable)
Vendor : MariaDB Corporation Ab
Summary : MaxScale
Description :
The MariaDB Corporation MaxScale is an intelligent proxy that allows forwarding of
database statements to one or more database servers using complex rules,
a semantic understanding of the database statements and the roles of
the various servers within the backend cluster of databases.
MaxScale is designed to provide load balancing and high availability
functionality transparently to the applications. In addition it provides
a highly scalable and flexible architecture, with plugin components to
support different protocols and routing decisions.
これで、Maxscaleが無事インストールできた。
3.設定
さて、次に設定を行おう。
「/etc/maxscale.cnf.template」をコピーして、設定ファイルを作成する。
cp /etc/maxscale.cnf.template /etc/maxscale.cnf●/etc/maxscale.cnf
[maxscale]
threads=4 # 同時処理数
log_messages=1
log_trace=1
logdir=/var/log/maxscale

[Splitter Service]
type=service
router=readwritesplit
servers=サーバ01,サーバ02,サーバ03
max_slave_connections=100%
user=maxscale
passwd=パスワード
localhost_match_wildcard_host=true
enable_root_user=true

[Splitter Listener]
type=listener
service=Splitter Service
protocol=MySQLClient
port=3306

[Galera Monitor]
type=monitor
module=galeramon
servers=サーバ01,サーバ02,サーバ03
user=maxscale
passwd=パスワード
monitor_interval=30000
#disable_master_failback=1

[CLI]
type=service
router=cli

[CLI Listener]
type=listener
service=CLI
protocol=maxscaled
address=localhost
port=6603

[サーバ名01]
type=server
address=IPアドレス
port=3306
protocol=MySQLBackend

[サーバ名02]
type=server
address=IPアドレス
port=3306
protocol=MySQLBackend

[サーバ名03]
type=server
address=IPアドレス
port=3306
protocol=MySQLBackend
次に、DB側で以下のURLを実行し、maxscale用のモニタリング用ユーザを作成する。
CREATE USER 'maxscale'@'127.0.0.1' identified by 'パスワード';
CREATE USER 'maxscale'@'%' identified by 'パスワード';
GRANT SELECT on mysql.user to 'maxscale'@'%';
GRANT SELECT ON mysql.db to 'maxscale'@'%';
GRANT SHOW DATABASES ON *.* to 'maxscale'@'%' ;
GRANT REPLICATION SLAVE on *.* to 'maxscale'@'%' ;
GRANT REPLICATION CLIENT on *.* to 'maxscale'@'%' ;
4.接続
後は、実際にMaxscaleを動作させて接続出来ることを確認するだけだ。
まず、以下のコマンドでMaxscaleを起動させる。
systemctl start maxscale次に、ちゃんとDBサーバを認識しているかどうかを確認する。
以下のコマンドを実行することで、DBサーバが認識されているかどうか、どのサーバが書き込みノード(マスター)かを確認する。
maxadmin -p パスワード(初期はmariadb) list servers[root@BS-PUB-GFRONT-01 ~]# maxadmin -p mariadb list servers
Servers.
-------------------+-----------------+-------+-------------+--------------------
Server | Address | Port | Connections | Status
-------------------+-----------------+-------+-------------+--------------------
BS-PUB-GALERA-01 | 172.28.0.132 | 3306 | 0 | Slave, Synced, Running
BS-PUB-GALERA-02 | 172.28.0.133 | 3306 | 0 | Master, Synced, Running
BS-PUB-GALERA-03 | 172.28.0.134 | 3306 | 0 | Slave, Synced, Running
-------------------+-----------------+-------+-------------+--------------------無事接続されていること、Masterノード(書き込みノード)が選定されている事が確認できた。
なお、このMasterの選定方法だが、GaleraClusterの『wsrep_local_index』が0のノードが自動的に選定される。
このため、この値が変動すると書き込みノードが切り替わるので注意。
次に、接続確認を行う。
Maxscaleを動作させている場合、自分自身に接続することでMaxscale経由での接続となるので、「127.0.0.1」に対し接続を実施する。
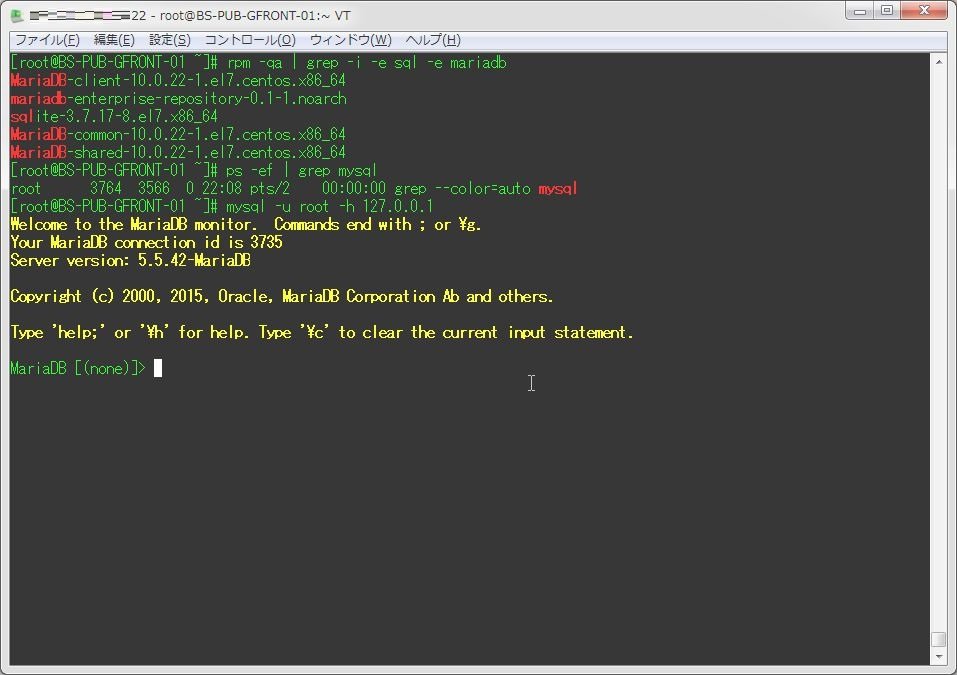
[root@BS-PUB-GFRONT-01 ~]# rpm -qa | grep -i -e sql -e mariadb
MariaDB-client-10.0.22-1.el7.centos.x86_64
mariadb-enterprise-repository-0.1-1.noarch
sqlite-3.7.17-8.el7.x86_64
MariaDB-common-10.0.22-1.el7.centos.x86_64
MariaDB-shared-10.0.22-1.el7.centos.x86_64
[root@BS-PUB-GFRONT-01 ~]# ps -ef | grep mysql
root      3764  3566  0 22:08 pts/2    00:00:00 grep --color=auto mysql
[root@BS-PUB-GFRONT-01 ~]# mysql -u root -h 127.0.0.1
Welcome to the MariaDB monitor.  Commands end with ; or \g.
Your MariaDB connection id is 3735
Server version: 5.5.42-MariaDB

Copyright (c) 2000, 2015, Oracle, MariaDB Corporation Ab and others.

Type 'help;' or '\h' for help. Type '\c' to clear the current input statement.

MariaDB [(none)]>
無事接続が出来ることが確認できた。
なお、実際に利用するユーザについては、リモートとローカルホスト(127.0.0.1)に同じ権限が付いている必要があるので注意する。

