
Windowsで画像ファイル(.jpgとかの拡張子のファイル)を右クリックすると、「デスクトップの背景として設定」という項目が出てくる。これを間違えて選択してしまうと、設定変更の確認も表示されずに即背景を設定されてしまい、人によっては煩わしい事この上ないものだ。
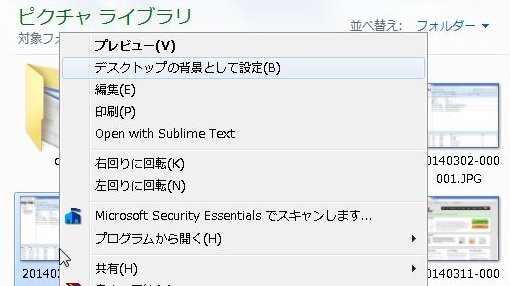
そこで、この項目を削除してしまおうと思う。
この項目を削除するには、レジストリをいじって削除するのが手っ取り早い。
レジストリをいじるにあたり、手順は2つある。
- regコマンドで設定
- レジストリエディタから手動で設定
この2つの手順を紹介する。
1.regコマンドで設定
まずはregコマンドでの設定方法から。
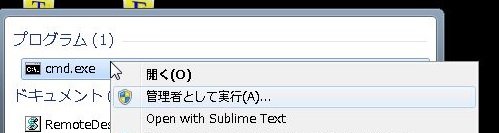
コマンドプロンプトを「管理者で実行」を行い、以下のコマンドを実行する。
reg delete HKEY_CLASSES_ROOT\SystemFileAssociations\.bmp\Shell /f
reg delete HKEY_CLASSES_ROOT\SystemFileAssociations\.dib\Shell /f
reg delete HKEY_CLASSES_ROOT\SystemFileAssociations\.gif\Shell /f
reg delete HKEY_CLASSES_ROOT\SystemFileAssociations\.jfif\Shell /f
reg delete HKEY_CLASSES_ROOT\SystemFileAssociations\.jpe\Shell /f
reg delete HKEY_CLASSES_ROOT\SystemFileAssociations\.jpeg\Shell /f
reg delete HKEY_CLASSES_ROOT\SystemFileAssociations\.jpg\Shell /f
reg delete HKEY_CLASSES_ROOT\SystemFileAssociations\.png\Shell /f
reg delete HKEY_CLASSES_ROOT\SystemFileAssociations\.tif\Shell /f
reg delete HKEY_CLASSES_ROOT\SystemFileAssociations\.tiff\Shell /f
reg delete HKEY_CLASSES_ROOT\SystemFileAssociations\.wdp\Shell /f
上記コマンドを実行した結果がこちら。

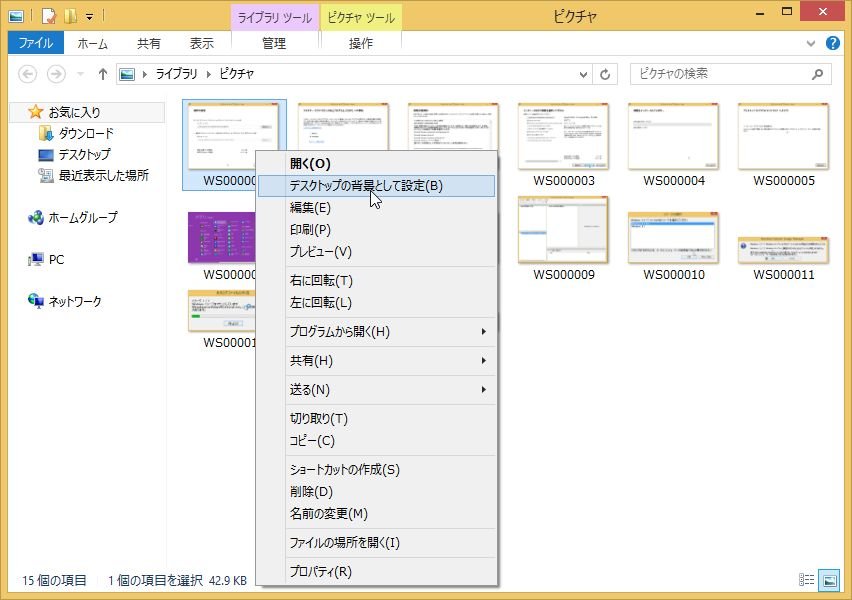
無事、右クリックのメニューから「デスクトップの背景として設定」を削除できた。
2015/07/05 追記
上記コマンドはWindows 7のものだが、Windows 8の場合は以下のコマンドになる。
reg delete HKEY_CLASSES_ROOT\SystemFileAssociations\.bmp\Shell\setdesktopwallpaper /f reg delete HKEY_CLASSES_ROOT\SystemFileAssociations\.dib\Shell\setdesktopwallpaper /f reg delete HKEY_CLASSES_ROOT\SystemFileAssociations\.gif\Shell\setdesktopwallpaper /f reg delete HKEY_CLASSES_ROOT\SystemFileAssociations\.jfif\Shell\setdesktopwallpaper /f reg delete HKEY_CLASSES_ROOT\SystemFileAssociations\.jpe\Shell\setdesktopwallpaper /f reg delete HKEY_CLASSES_ROOT\SystemFileAssociations\.jpeg\Shell\setdesktopwallpaper /f reg delete HKEY_CLASSES_ROOT\SystemFileAssociations\.jpg\Shell\setdesktopwallpaper /f reg delete HKEY_CLASSES_ROOT\SystemFileAssociations\.png\Shell\setdesktopwallpaper /f reg delete HKEY_CLASSES_ROOT\SystemFileAssociations\.tif\Shell\setdesktopwallpaper /f reg delete HKEY_CLASSES_ROOT\SystemFileAssociations\.tiff\Shell\setdesktopwallpaper /f reg delete HKEY_CLASSES_ROOT\SystemFileAssociations\.wdp\Shell\setdesktopwallpaper /f ```  # 2.レジストリエディタから手動で設定 次はレジストリエディタから手動で削除を行う場合の手順。 まずはレジストリエディタを起動させる。スタートメニューの検索ウィンドウもしくは「Windowsキー」 + 「Rキー」を押下して、「ファイル名を指定して実行」のウィンドウを開き、「regedit」と入力し起動させる。  レジストリエディタを開いたら、以下のパスにフォルダを移動する。  ```properties HKEY_CLASSES_ROOT\SystemFileAssociations\.bmp\Shell ``` 移動後、対象のフォルダを右クリックし「削除」をクリック。「キーの削除の確認」ウィンドウが表示されるので、「はい」をクリックしてフォルダを削除する。   これと同じように、以下のフォルダも削除する。 ```properties HKEY_CLASSES_ROOT\SystemFileAssociations\.dib\Shell HKEY_CLASSES_ROOT\SystemFileAssociations\.gif\Shell HKEY_CLASSES_ROOT\SystemFileAssociations\.jfif\Shell HKEY_CLASSES_ROOT\SystemFileAssociations\.jpe\Shell HKEY_CLASSES_ROOT\SystemFileAssociations\.jpeg\Shell HKEY_CLASSES_ROOT\SystemFileAssociations\.jpg\Shell HKEY_CLASSES_ROOT\SystemFileAssociations\.png\Shell HKEY_CLASSES_ROOT\SystemFileAssociations\.tif\Shell HKEY_CLASSES_ROOT\SystemFileAssociations\.tiff\Shell HKEY_CLASSES_ROOT\SystemFileAssociations\.wdp\Shell ``` 全てのフォルダを削除したら完了。

