
リモートから脆弱性をスキャンする方法はいろいろあるが、その中でも比較的有名なのがOpenVASだ。
コマンドや管理画面から指定したホストに対しホストの外部・内部からスキャンを実施することで脆弱性をスキャン、検知させることが可能だ。
細かくはこちらの記事が非常に詳しく書かれているので、一読するとよいだろう。
今回は、このOpenVASをCentOS 7にインストールする。
1.インストール
まずは、以下のコマンドを実行してリポジトリを追加する。
wget -q -O - http://www.atomicorp.com/installers/atomic |sh[root@BS-PUB-WEBTOOL-TEST01 ~]# wget -q -O - http://www.atomicorp.com/installers/atomic |sh
Atomic Free Unsupported Archive installer, version 3.0.1
BY INSTALLING THIS SOFTWARE AND BY USING ANY AND ALL SOFTWARE
PROVIDED BY ATOMICORP LIMITED YOU ACKNOWLEDGE AND AGREE:
THIS SOFTWARE AND ALL SOFTWARE PROVIDED IN THIS REPOSITORY IS
PROVIDED BY ATOMICORP LIMITED AS IS, IS UNSUPPORTED AND ANY
EXPRESS OR IMPLIED WARRANTIES, INCLUDING, BUT NOT LIMITED TO, THE
IMPLIED WARRANTIES OF MERCHANTABILITY AND FITNESS FOR A PARTICULAR
PURPOSE ARE DISCLAIMED. IN NO EVENT SHALL ATOMICORP LIMITED, THE
COPYRIGHT OWNER OR ANY CONTRIBUTOR TO ANY AND ALL SOFTWARE PROVIDED
BY OR PUBLISHED IN THIS REPOSITORY BE LIABLE FOR ANY DIRECT,
INDIRECT, INCIDENTAL, SPECIAL, EXEMPLARY, OR CONSEQUENTIAL DAMAGES
(INCLUDING, BUT NOT LIMITED TO, PROCUREMENT OF SUBSTITUTE GOODS
OR SERVICES; LOSS OF USE, DATA, OR PROFITS; OR BUSINESS INTERRUPTION)
HOWEVER CAUSED AND ON ANY THEORY OF LIABILITY, WHETHER IN CONTRACT,
STRICT LIABILITY, OR TORT (INCLUDING NEGLIGENCE OR OTHERWISE)
ARISING IN ANY WAY OUT OF THE USE OF THIS SOFTWARE, EVEN IF ADVISED
OF THE POSSIBILITY OF SUCH DAMAGE.
For supported software packages please contact us at:
sales@atomicorp.com
Do you agree to these terms? (yes/no) [Default: yes] yes
Configuring the [atomic] repo archive for this system
Installing the Atomic GPG keys: OK
Downloading atomic-release-1.0-21.el7.art.noarch.rpm: Preparing... ################################# [100%]
Updating / installing...
1:atomic-release-1.0-21.el7.art ################################# [100%]
OK
Enable repo by default? (yes/no) [Default: yes]: yes
The Atomic repo has now been installed and configured for your system
The following channels are available:
atomic - [ACTIVATED] - contains the stable tree of ART packages
atomic-testing - [DISABLED] - contains the testing tree of ART packages
atomic-bleeding - [DISABLED] - contains the development tree of ART packages
リポジトリ導入後、以下のコマンドでOpenVASをインストールする。
yum -y install openvasこれで、OpenVASのインストールが完了した。
2.設定
インストールが完了したら、以下のコマンドでOpenVASの初期セットアップを実施する。
なお、bzip2が必要なので事前にインストールしている。入力を求められる箇所については、すべてデフォルトで進めていく。
yum -y install bzip2
openvas-setup
[root@BS-PUB-WEBTOOL-TEST01 ~]# openvas-setup
Openvas Setup, Version: 1.0
Step 1: Update NVT, CERT, and SCAP data
Please note this step could take some time.
Once completed, this will be updated automatically every 24 hours
Select download method
* wget (NVT download only)
* curl (NVT download only)
* rsync
Note: If rsync requires a proxy, you should define that before this step.
Downloader [Default: rsync]
Updating NVTs....
[i] This script synchronizes an NVT collection with the 'OpenVAS NVT Feed'.
[i] The 'OpenVAS NVT Feed' is provided by 'The OpenVAS Project'.
[i] Online information about this feed: 'http://www.openvas.org/openvas-nvt-feed.html'.
[i] NVT dir: /var/lib/openvas/plugins
[w] Could not determine feed version.
[i] rsync is not recommended for the initial sync. Falling back on http.
[i] Will use wget
.....
Updating OpenVAS Manager database....
Pausing while openvas-scanner loads NVTs...Done
Step 2: Configure GSAD
The Greenbone Security Assistant is a Web Based front end
for managing scans. By default it is configured to only allow
connections from localhost.
Allow connections from any IP? [Default: yes]
Redirecting to /bin/systemctl restart gsad.service
Step 3: Choose the GSAD admin users password.
The admin user is used to configure accounts,
Update NVT's manually, and manage roles.
<span style="color: #339966;">Enter administrator username [Default: admin] :
Enter Administrator Password:
Verify Administrator Password:</span>
Redirecting to /bin/systemctl start redis.service
Setup complete, you can now access GSAD at:
https://<IP>:9392
Created symlink from /etc/systemd/system/multi-user.target.wants/openvas-scanner.service to /usr/lib/systemd/system/openvas-scanner.service.
Created symlink from /etc/systemd/system/multi-user.target.wants/openvas-manager.service to /usr/lib/systemd/system/openvas-manager.service.
Created symlink from /etc/systemd/system/multi-user.target.wants/gsad.service to /usr/lib/systemd/system/gsad.service.これで、初期セットアップが完了した。
念のため、Firewalld、SELinuxを停止しておく。
systemctl stop firewalld
systemctl disable firewalld
setenforce 0
sed -i.bak "/SELINUX/s/enforcing/disabled/g" /etc/selinux/config
SSL用の証明書を作成する。
openvas-mkcert-client -n om -i[root@BS-PUB-WEBTOOL-TEST01 ~]# openvas-mkcert-client -n om -i
Generating RSA private key, 4096 bit long modulus
..................................................................++
.......................................................++
e is 65537 (0x10001)
You are about to be asked to enter information that will be incorporated
into your certificate request.
What you are about to enter is what is called a Distinguished Name or a DN.
There are quite a few fields but you can leave some blank
For some fields there will be a default value,
If you enter '.', the field will be left blank.
-----
Country Name (2 letter code) [DE]:State or Province Name (full name) [Some-State]:Locality Name (eg, city) []:Organization Name (eg, company) [Internet Widgits Pty Ltd]:Organizational Unit Name (eg, section) []:Common Name (eg, your name or your server's hostname) []:Email Address []:Using configuration from /tmp/openvas-mkcert-client.8221/stdC.cnf
Check that the request matches the signature
Signature ok
The Subject's Distinguished Name is as follows
countryName :PRINTABLE:'DE'
localityName :PRINTABLE:'Berlin'
commonName :PRINTABLE:'om'
Certificate is to be certified until Aug 25 00:29:42 2017 GMT (365 days)
Write out database with 1 new entries
Data Base Updated
Your client certificates are in /tmp/openvas-mkcert-client.8221 .
You will have to copy them by hand.最後に、OpenVASのデータベースファイルをリビルドしてOpenVAS Managerを起動させる。
念のため、Redisも再起動しておく。
openvasmd --rebuild
openvasmd
/bin/systemctl restart redis.service
3.Webブラウザからアクセスする
インストール・初期設定が完了したら、Webブラウザから「https://IPアドレス:9392」へアクセスする。
ログインID/PWは「openvas-setup」コマンドで設定したものを利用する。
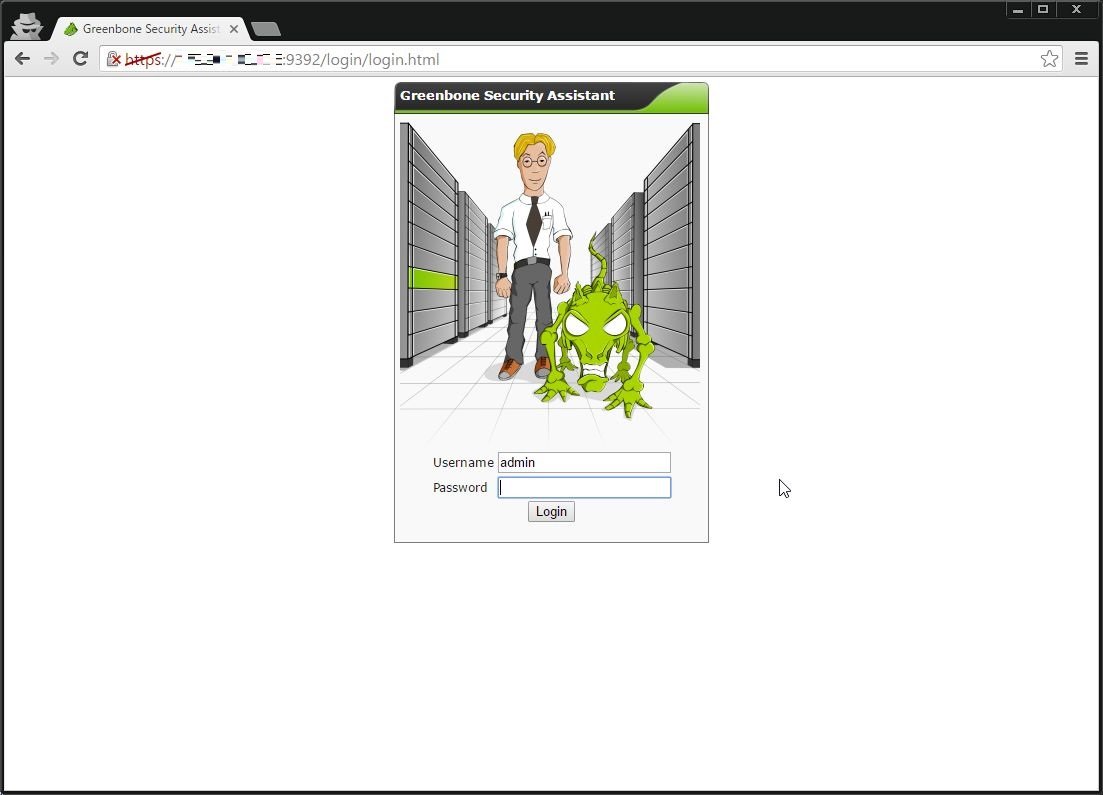
ログイン後の画面がこちら。
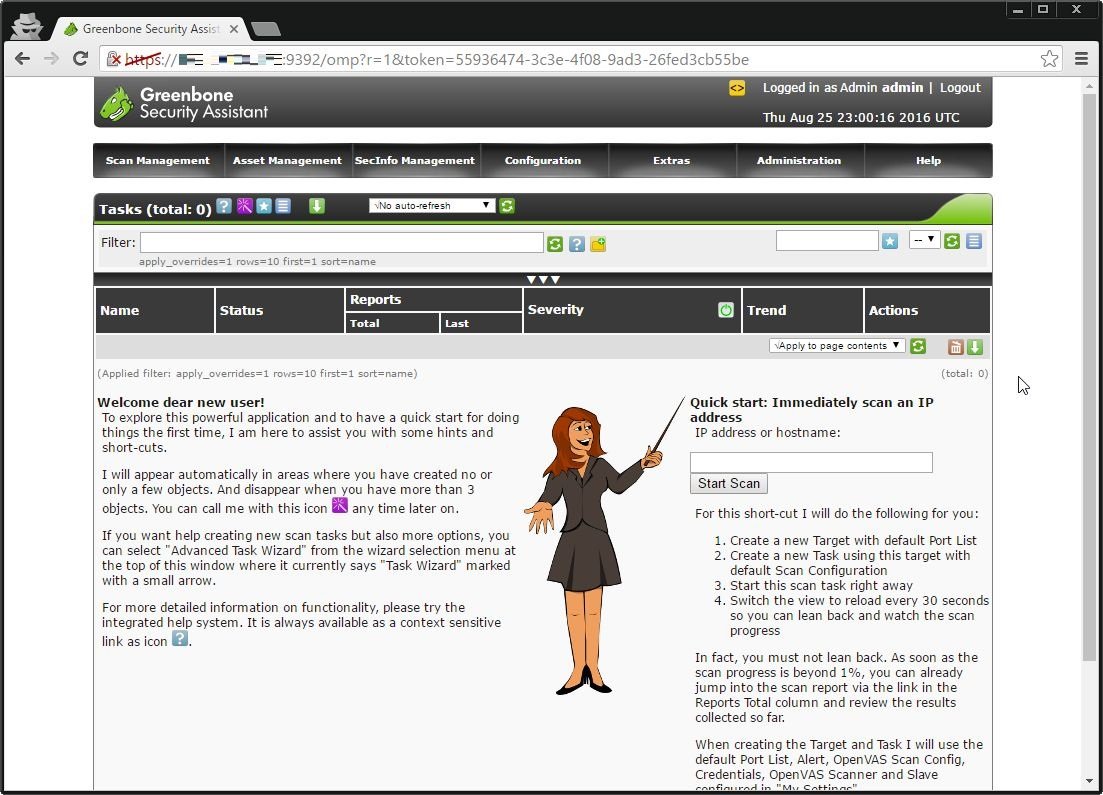
3.対象のホストにクイックスキャンをかける
さて、OpenVASにはいろいろな機能があるが、とりあえず指定したホストに対してクイックスキャンをかけてみよう。
画面右側にある「Quick Start」のとこで対象ホストのIPアドレスを入力し、「Start Scan」ボタンを押下する。

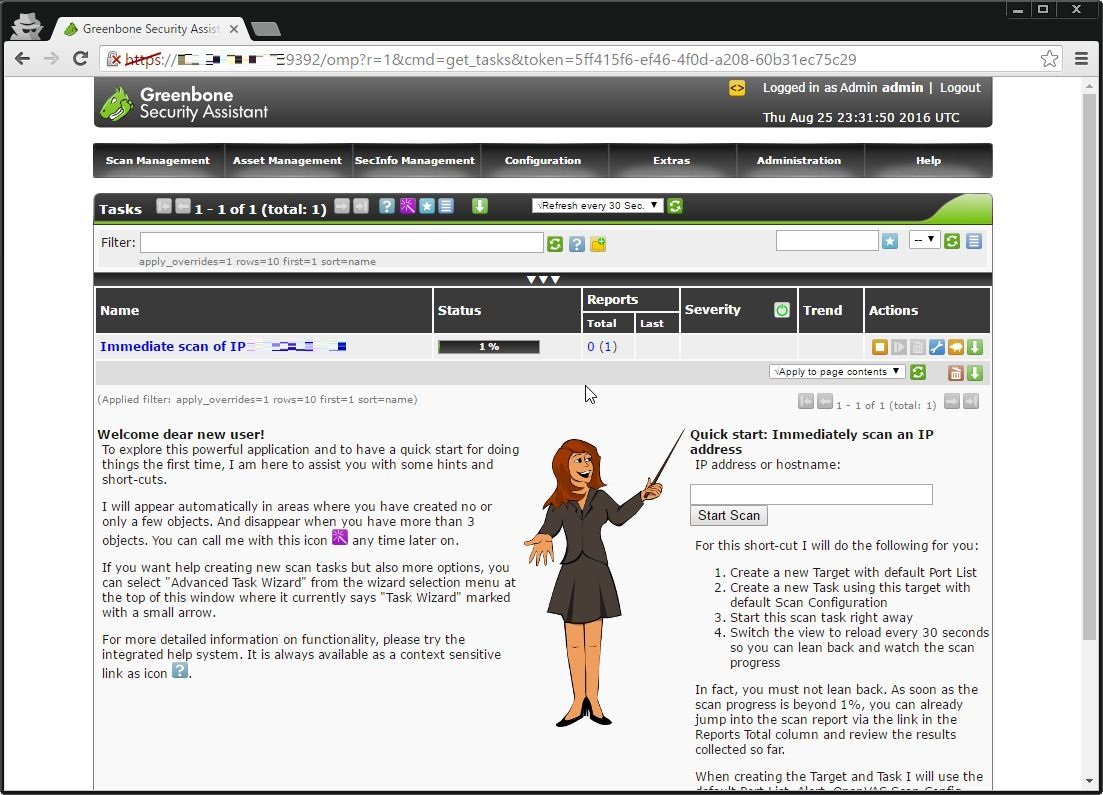
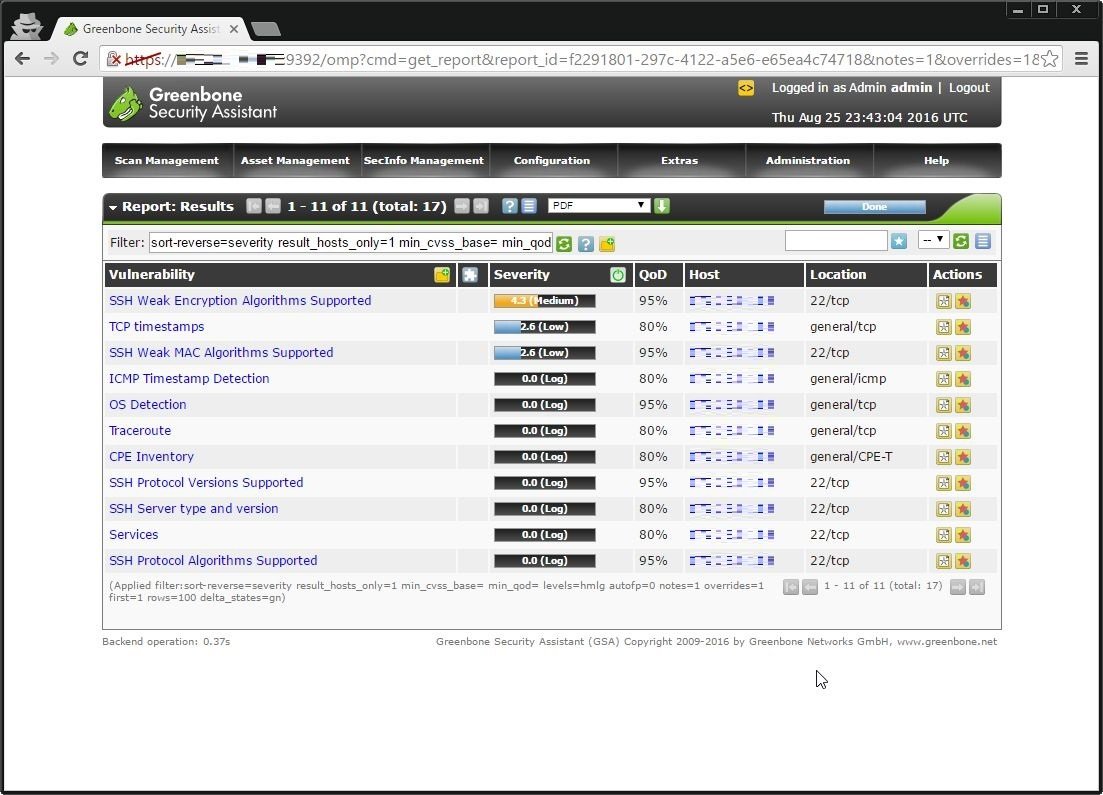
クイックスキャンが実行される。
終了したらレポートが見れるようになるので、スキャン終了まで待つ。
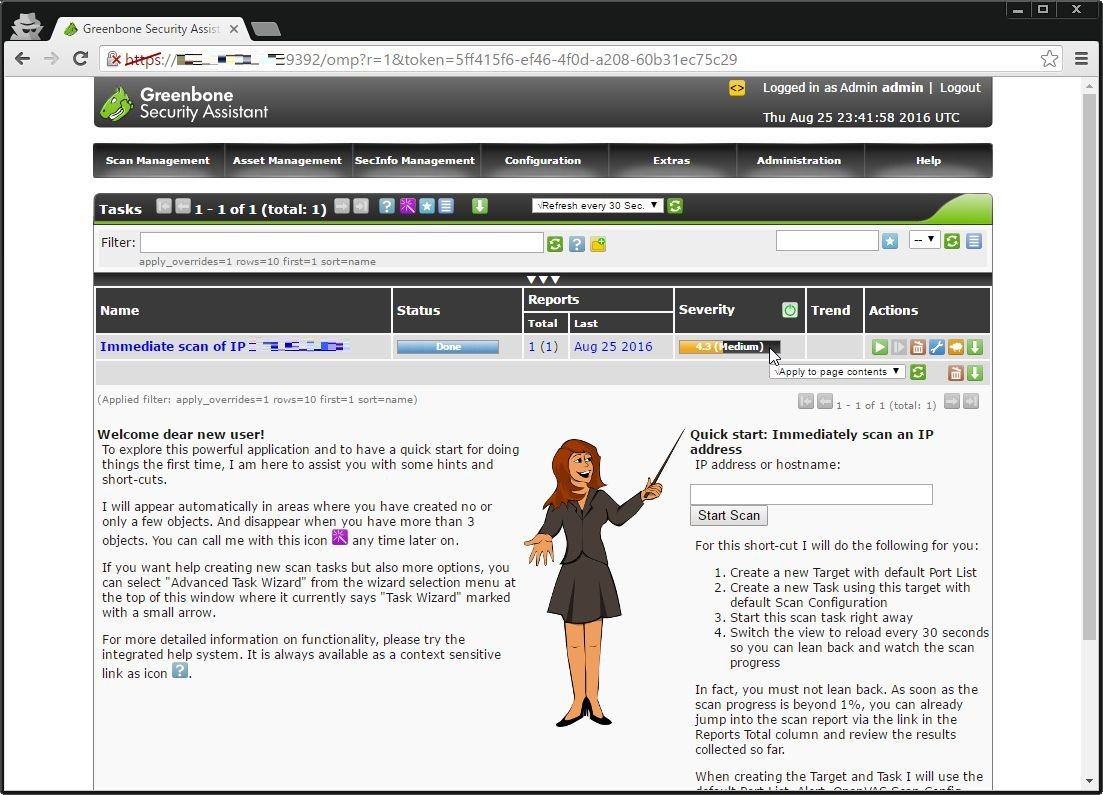
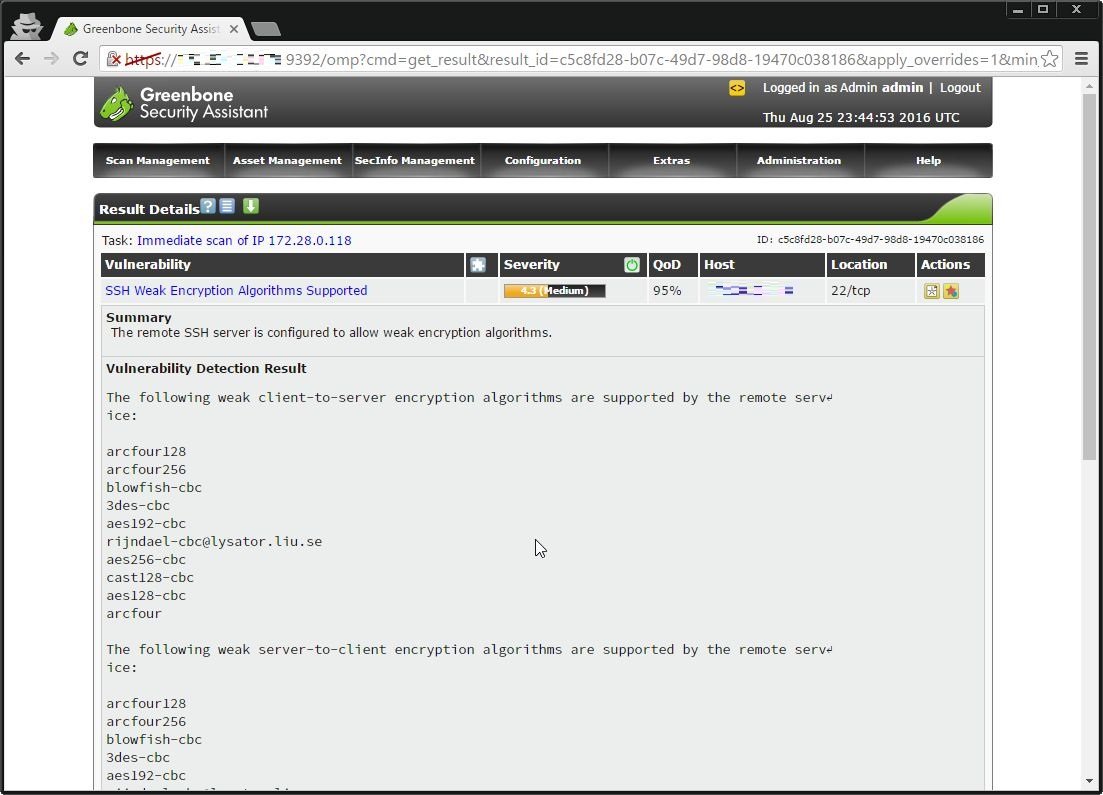
レポートを見ると、OSのコマンド検証用として内部でのみ使ってるサーバ(sshくらいしか動いてない)でも脆弱性が確認できる。
定期スキャンもできるので、定期的にスキャンを行わせて脆弱性があったらすぐに対応できるようにしたい。
…まぁ、第三者のサーバとかにかけると思いっきり攻撃になるので、自分のサーバ限定で。

