
仕事で、チームでのパスワードや鍵管理の方法について調べていて、それ専用のツールとして作られた「RatticDB」なるものを見かけたので、検証として使ってみることにした。
今回は、CentOS 7にこのツールをインストールして使ってみることにする。手順についてはこちらを参考に進め、DB用にデバイスを暗号化した領域を設ける(手順内で暗号化する)。
1.前提パッケージのインストール・設定
まずは、前提となるパッケージのインストールから…の前に、とりあえずSELinuxを無効化しておく。
setenforce 0
sed -i.bak "/SELINUX/s/enforcing/disabled/g" /etc/selinux/config
前提パッケージの導入のため、以下のコマンドを実行する。
yum install -y epel-release
yum update -y
yum upgrade -y
yum groupinstall -y development web-server
yum install -y gcc openldap-devel bzip2-devel sqlite-devel libxml2-devel libxslt-devel wget openssl-devel python-pip cryptsetup mod_wsgi vim tk-devel ncurses-devel readline-devel mysql-devel ntp httpd-devel python-devel mariadb-server mariadb
systemctl start ntpd
systemctl enable ntpd
systemctl start mariadb
systemctl enable mariadb
2.DBのセットアップ
次に、インストールしたMariaDBで最低限のセキュリティ設定を行う。
mysql_secure_installation[root@BS-PUB-CENT7-01 ~]# mysql_secure_installation
/usr/bin/mysql_secure_installation: 行 379: find_mysql_client: コマンドが見つかりません
NOTE: RUNNING ALL PARTS OF THIS SCRIPT IS RECOMMENDED FOR ALL MariaDB
SERVERS IN PRODUCTION USE! PLEASE READ EACH STEP CAREFULLY!
In order to log into MariaDB to secure it, we'll need the current
password for the root user. If you've just installed MariaDB, and
you haven't set the root password yet, the password will be blank,
so you should just press enter here.
Enter current password for root (enter for none):
OK, successfully used password, moving on...
Setting the root password ensures that nobody can log into the MariaDB
root user without the proper authorisation.
Set root password? [Y/n]
New password:
Re-enter new password:
Password updated successfully!
Reloading privilege tables..
... Success!
By default, a MariaDB installation has an anonymous user, allowing anyone
to log into MariaDB without having to have a user account created for
them. This is intended only for testing, and to make the installation
go a bit smoother. You should remove them before moving into a
production environment.
Remove anonymous users? [Y/n]
... Success!
Normally, root should only be allowed to connect from 'localhost'. This
ensures that someone cannot guess at the root password from the network.
Disallow root login remotely? [Y/n]
... Success!
By default, MariaDB comes with a database named 'test' that anyone can
access. This is also intended only for testing, and should be removed
before moving into a production environment.
Remove test database and access to it? [Y/n]
- Dropping test database...
... Success!
- Removing privileges on test database...
... Success!
Reloading the privilege tables will ensure that all changes made so far
will take effect immediately.
Reload privilege tables now? [Y/n]
... Success!
Cleaning up...
All done! If you've completed all of the above steps, your MariaDB
installation should now be secure.
Thanks for using MariaDB!DBおよびユーザの作成を行う。
mysql -u root -p \
      -e 'CREATE DATABASE rattic;
          CREATE USER rattic@localhost identified by "RatticDB接続用パスワード";
          GRANT ALL ON rattic.* TO rattic;'
3.デバイスの暗号化&DBディレクトリの移動
次に、DBを格納するデバイスが暗号化されていないのはまずいので、ディスクを追加して暗号化する。
cryptsetup luksFormat /dev/sdb1
cryptsetup luksOpen /dev/sdb1 rattic_encrypted
pvcreate /dev/mapper/rattic_encrypted
vgcreate rattic_VG /dev/mapper/rattic_encrypted
lvcreate -l 100%VG -n rattic_LV rattic_VG
mkfs.ext4 /dev/mapper/rattic_VG-rattic_LV
mkdir -p /opt/apps/mysql
mount /dev/mapper/rattic_VG-rattic_LV /opt/apps/mysql
[root@BS-PUB-CENT7-01 ~]# cryptsetup luksFormat /dev/sdb1

WARNING!
========
This will overwrite data on /dev/sdb1 irrevocably.

Are you sure? (Type uppercase yes): YES
Enter passphrase:
Verify passphrase:
[root@BS-PUB-CENT7-01 ~]# cryptsetup luksOpen /dev/sdb1 rattic_encrypted
Enter passphrase for /dev/sdb1:
[root@BS-PUB-CENT7-01 ~]# pvcreate /dev/mapper/rattic_encrypted
  Physical volume "/dev/mapper/rattic_encrypted" successfully created
[root@BS-PUB-CENT7-01 ~]# vgcreate rattic_VG /dev/mapper/rattic_encrypted
  Volume group "rattic_VG" successfully created
[root@BS-PUB-CENT7-01 ~]# lvcreate -l 100%VG -n rattic_LV rattic_VG
  Logical volume "rattic_LV" created.
[root@BS-PUB-CENT7-01 ~]# mkfs.ext4 /dev/mapper/rattic_VG-rattic_LV
mke2fs 1.42.9 (28-Dec-2013)
Filesystem label=
OS type: Linux
Block size=4096 (log=2)
Fragment size=4096 (log=2)
Stride=0 blocks, Stripe width=0 blocks
3276800 inodes, 13106176 blocks
655308 blocks (5.00%) reserved for the super user
First data block=0
Maximum filesystem blocks=2162163712
400 block groups
32768 blocks per group, 32768 fragments per group
8192 inodes per group
Superblock backups stored on blocks:
        32768, 98304, 163840, 229376, 294912, 819200, 884736, 1605632, 2654208,
        4096000, 7962624, 11239424

Allocating group tables: done
Writing inode tables: done
Creating journal (32768 blocks): done
Writing superblocks and filesystem accounting information: done

[root@BS-PUB-CENT7-01 ~]# mkdir -p /opt/apps/mysql
[root@BS-PUB-CENT7-01 ~]# mount /dev/mapper/rattic_VG-rattic_LV /opt/apps/mysql
デバイスを暗号化したら、先ほどインストールしたMariaDBの場所を移動する。
systemctl stop mariadb
cp -r /var/lib/mysql/* /opt/apps/mysql
mv /var/lib/mysql /var/lib/mysql.old
ln -s /opt/apps/mysql /var/lib/mysql
chown -R mysql:mysql /opt/apps/mysql/
sed -i.bk 's|/var/lib|/opt/apps|g' /etc/my.cnf
systemctl start mariadb
4.RatticDBをインストールする
さて、それではRatticDBをインストールしよう。
まず、以下のコマンドでソースのダウンロードと配置、その他細かい処理を行う。
cd /tmp
wget https://github.com/tildaslash/RatticWeb/archive/v1.3.1.tar.gz
tar -xzvf v1.3.1.tar.gz
mv RatticWeb-1.3.1 /opt/apps/RatticWeb
cd /opt/apps/RatticWeb
pip install -r requirements-mysql.txt -r requirements-dev.txt
mkdir -p /opt/apps/RatticWeb/static
useradd -c "RatticWeb" -m rattic
chown -R rattic:rattic /opt/apps/RatticWeb
次に、Ratticの設定ファイルを新規作成、編集する。
●/opt/apps/RatticWeb/conf/local.cfg
[ratticweb]
debug = False
secretkey = Ratticシークレットパスワード
hostname = ratticdb

[filepaths]
static = /opt/apps/RatticWeb/static

[database]
engine = django.db.backends.mysql
name = rattic
user = rattic
password = RatticDB接続用パスワード
host = localhost
port = 3306
ファイル作成後、所有者をratticにしておく。
また、環境にもよると思うが、念のためこちらの対応を行っておく。
chown rattic:rattic /opt/apps/RatticWeb/conf/local.cfg
rm -rf /usr/lib/python2.7/site-packages/kombu/transport/django/migrations/
rm -rf /usr/lib/python2.7/site-packages/djcelery/migrations/
mv /usr/lib/python2.7/site-packages/kombu/transport/django/{south_migrations,migrations}
mv /usr/lib/python2.7/site-packages/djcelery/{south_migrations,migrations}
最後に、以下のようにスクリプトを実行してデータベースへの書き込みなどの処理を行わせる。
cd /opt/apps/RatticWeb/
./manage.py syncdb --noinput
./manage.py migrate --all
./manage.py collectstatic -c --noinput
./manage.py demosetup
5.Apacheの設定
最後に、Apacheの設定をしておく。
以下のようなファイルを作成する。
●/etc/httpd/conf.d/rattic.conf
<VirtualHost *:80>
    ServerName ratticdb
    ServerAlias ratticdb
    Redirect permanent / https://ratticdb
</VirtualHost>
    Alias /robots.txt /opt/apps/RatticWeb/static/robots.txt
    Alias /favicon.ico /opt/apps/RatticWeb/static/favicon.ico
    AliasMatch ^/([^/]*\.css) /opt/apps/RatticWeb/static/styles/$1
    Alias /media/ /opt/apps/RatticWeb/media/
    Alias /static/ /opt/apps/RatticWeb/static/
<Directory /opt/apps/RatticWeb/static>
    #Order deny,allow
    #Allow from all
    Require all granted
</Directory>
<Directory /opt/apps/RatticWeb/media>
    #Order deny,allow
    #Allow from all
    Require all granted
</Directory>
#WSGISocketPrefix run/wsgi
WSGIScriptAlias / /opt/apps/RatticWeb/ratticweb/wsgi.py
WSGIPassAuthorization On
WSGIDaemonProcess rattic processes=2 threads=25 home=/opt/apps/RatticWeb/ python-path=/opt/apps/RatticWeb display-name=%{GROUP}
WSGIProcessGroup rattic
<Directory /opt/apps/RatticWeb/ratticweb>
    <Files wsgi.py>
        #Order deny,allow
        #Allow from all
        Require all granted
    </Files>
</Directory>
作業完了後、サービス再起動とファイアウォールのポートを開ける。
systemctl restart httpd
iptables -I INPUT -m state --state NEW -p tcp --dport 80 -j ACCEPT
iptables -I INPUT -m state --state NEW -p tcp --dport 443 -j ACCEPT
6.実際に使ってみる
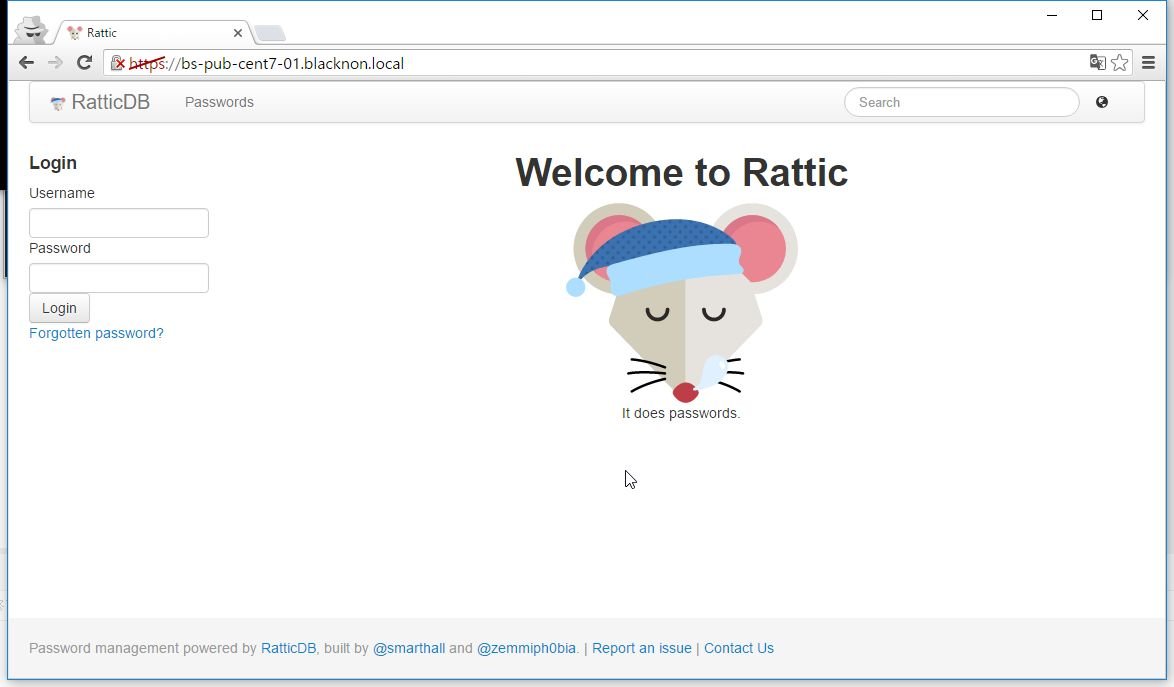
さて、それでは実際にブラウザからアクセスしてみよう。
「https://サーバ名」にアクセスし、ログインしてみよう。初期のID/PWは「admin/rattic」となっている。
ログインすると、パスワード一覧のページが表示される。
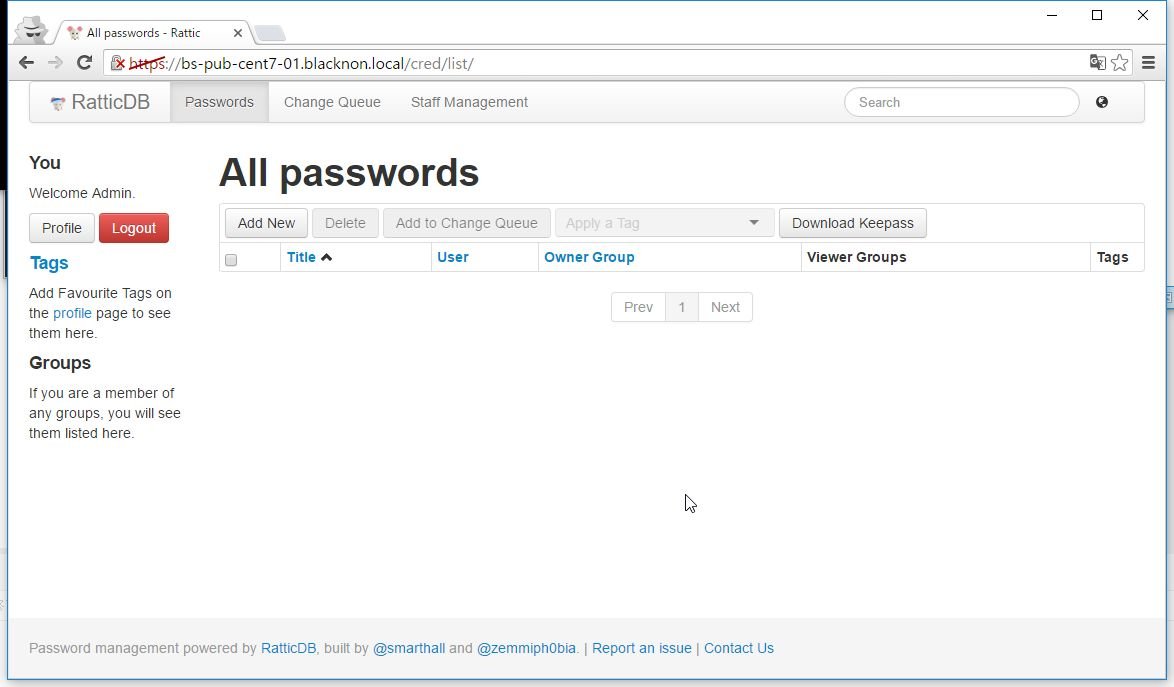
あとは、ユーザやその所属するグループを作成し、それらに応じた鍵の暗号化処理を行わせて、随時鍵を登録していけばよい。そんなに迷うようなことはないだろう。
まずは、用意されているデモページを触ってみることをお勧めする。
一応、LDAPとの連携もできるようなので、悪くないと思う。
また、(あんまりメンテナンスされてなさそうだけど)CLIのツールも用意されてたりするので、結構使えそうな気がする。

